⚠️ Note: the printing software was updated recently so this is not entirely accurate!
This is a guide for printing on the Xerox, or DocuColor, in the production lab.
- Bring your file (USB/email) to the computer labeled
XEROXin the Production Lab.- Note: for faster printing keep this file small.
- Drag your file in to the
Heldsection of theCommand WorkStationprinting software.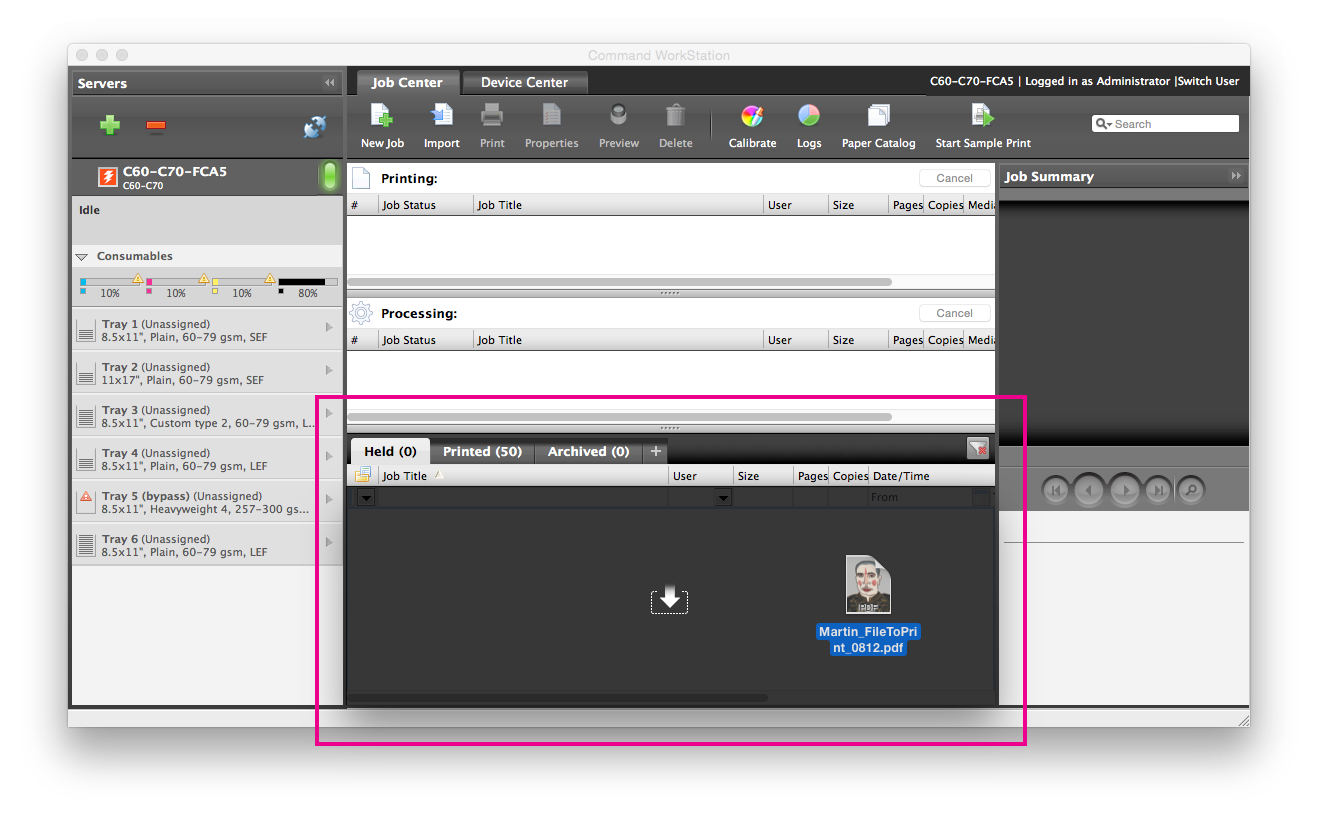
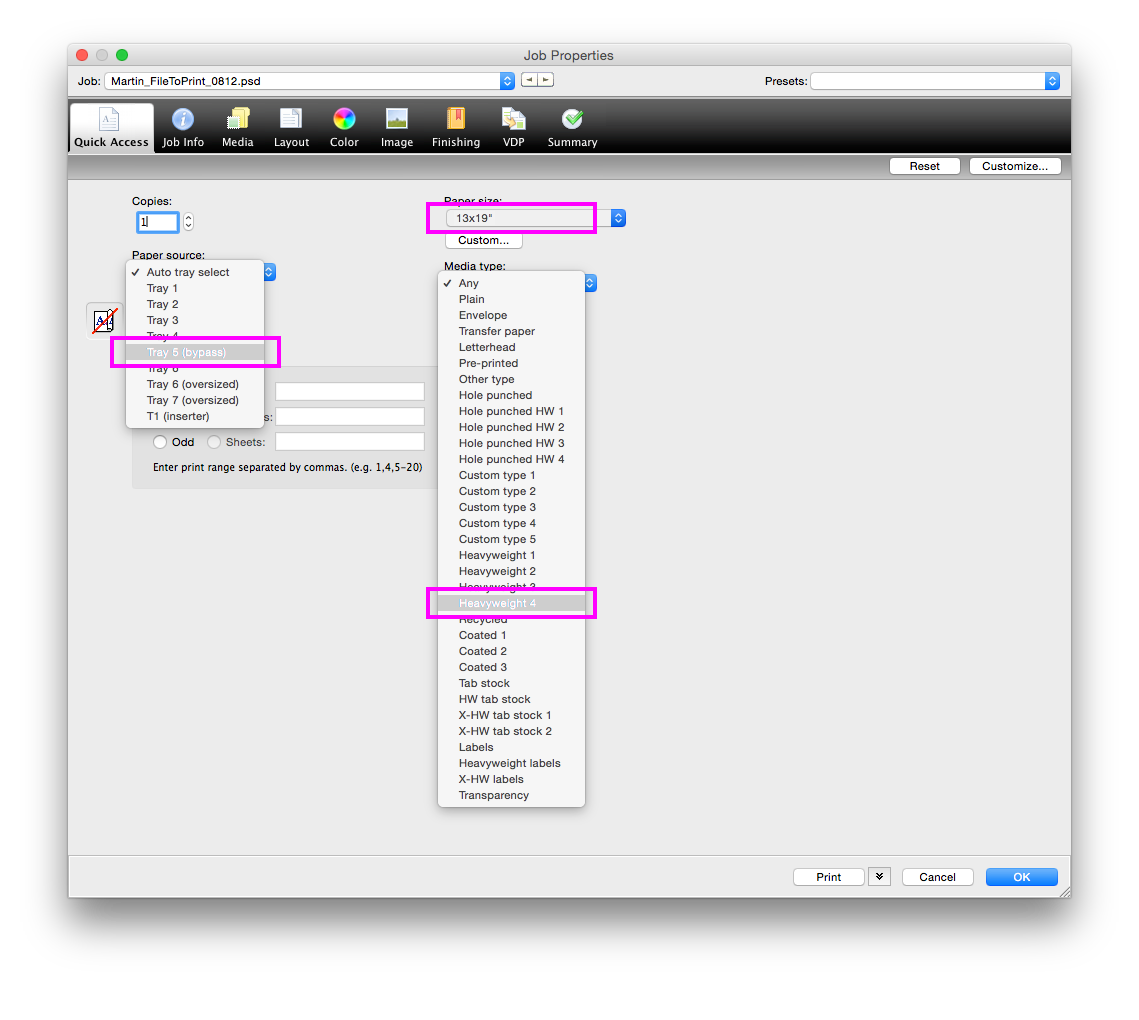
- Open the properties window for your file by selecting your file listed in the
Heldsection and either clickingPropertiesin the top toolbar or in the right click menu. - Here you will set the number of copies, the paper size, the type of paper you are printing on, and the tray which the paper will come from.
- Note: each type of paper requires a different setting.
- In this example I am printing on 13×19″ Heavyweight which means I need to load my paper into the bypass tray (Tray 5) and tell the printing software to look for the paper there.
- You can click
Printfrom this window or clickOkand print from the top toolbar in the main window. - Once you click
Printthe file will begin it’s journey to the printer:

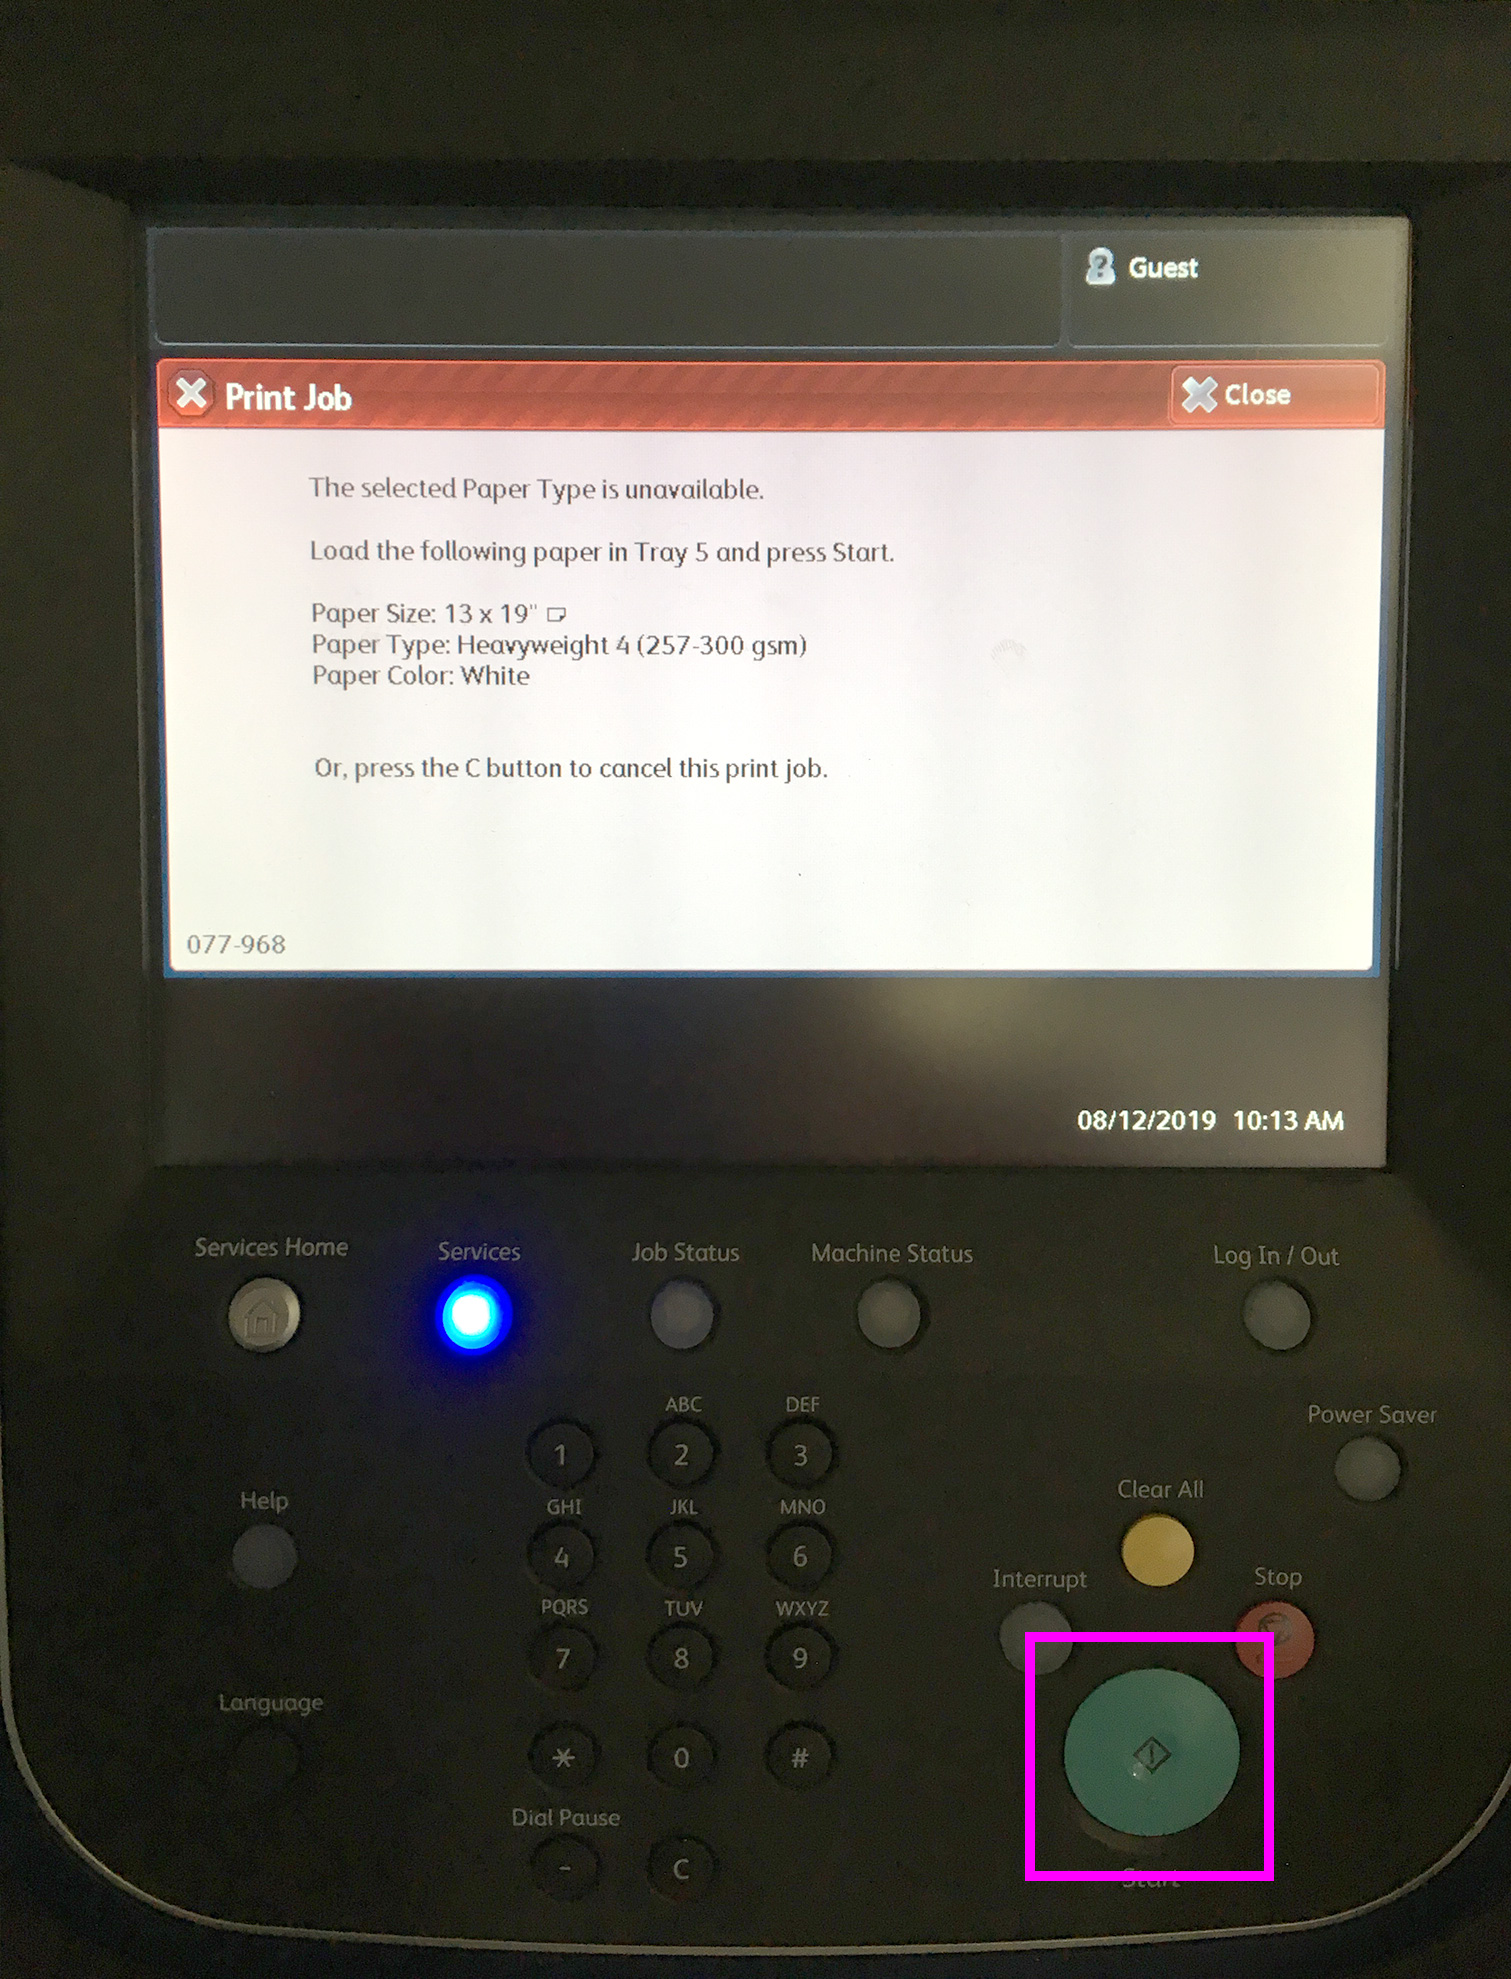
- But your journey has just begun. If you are using unique paper weights or sizes and have selected
Tray 5as your paper source you need to confirm this setting on the physical printer’s monitor by hitting the big green button:
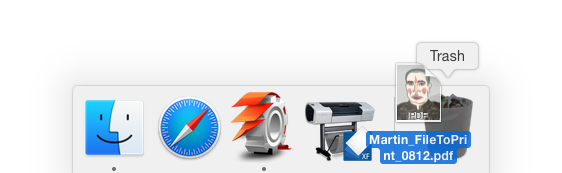
- Nice! You’re done. But wait—did you download your file to the computer you printed it from? Is that file still sitting on the desktop?? Remember to delete it when you’re done. Here’s a visual illustration of that: